How my Resolve workflow has evolved
I'm currently working on cutting Episode 8 of the #podcast and even in the span of these couple of months my production workflow has evolved some. As I'm learning the tool and its capabilities things become more streamlined.
One of the big changes actually happened to the audio. Before I did some prep work in Audacity, but the final mixing and VST plugins were applied in Resolve, however now I do all audio cleanup work in Reaper, bounce it down to a final mix, and then just import it into the project. Mostly because it's easier to have a preset for all the plugin settings in Reaper, maybe I just haven't found a good way to do this in Resolve, but since I still need to use a DAW to trim silences, breathing noises, and other things, it makes it easier to just do all audio-related tasks there. I'll make a post about my Reaper workflow at some point.
Approach 1
So, for instance, in the first couple of episodes I had a video for the animated background that I use, which I got from Pexels. It's only a few seconds long, and originally I had to copy-paste the track back-to-back to achieve a continuous animation.
Approach 2
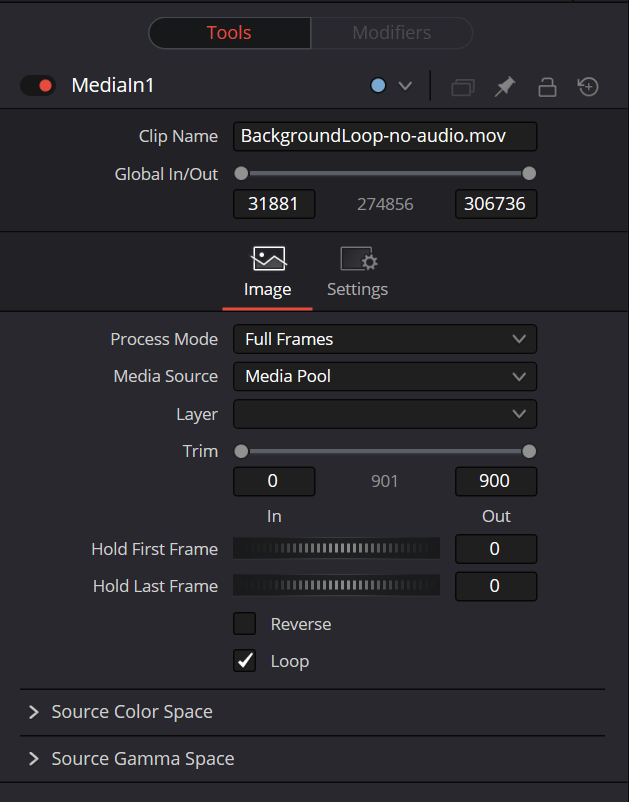
Later on I came up with a trick in using Fusion, to set the clip to loop internally, and expand the Global In/Out Frames to the max, which also requires creating a Fusion clip of the correct length. You also need to set Hold Frames to 0.

This worked but required creating a separate track to keep the composition there.
Current Approach
Because I do the keying of the green screen in fusion, you can simply add the clip into the same composition, and just merge it with the output of the keyer. This way you don't need to mess around with new Fusion clips, it's guaranteed to be the correct length, and you don't need a separate track for it.
